I’m going to talk about what I feel are the essential tools for beginner blacksmiths. I’m going to assume you’ve already got yourself a hammer, anvil, and forge. If not, and you’re just now looking to get into blacksmithing, then I do have an article covering how to get started blacksmithing which goes over these items in detail. I will cover them briefly below though for thoroughness though.
I’m going to stick to relatively simple tools that aren’t too expensive. I won’t be talking about power hammers or anything; just simple tools to help you along your blacksmithing journey.
These tools are things I got as a beginner that were game-changing and well worth investing in as you have the money.
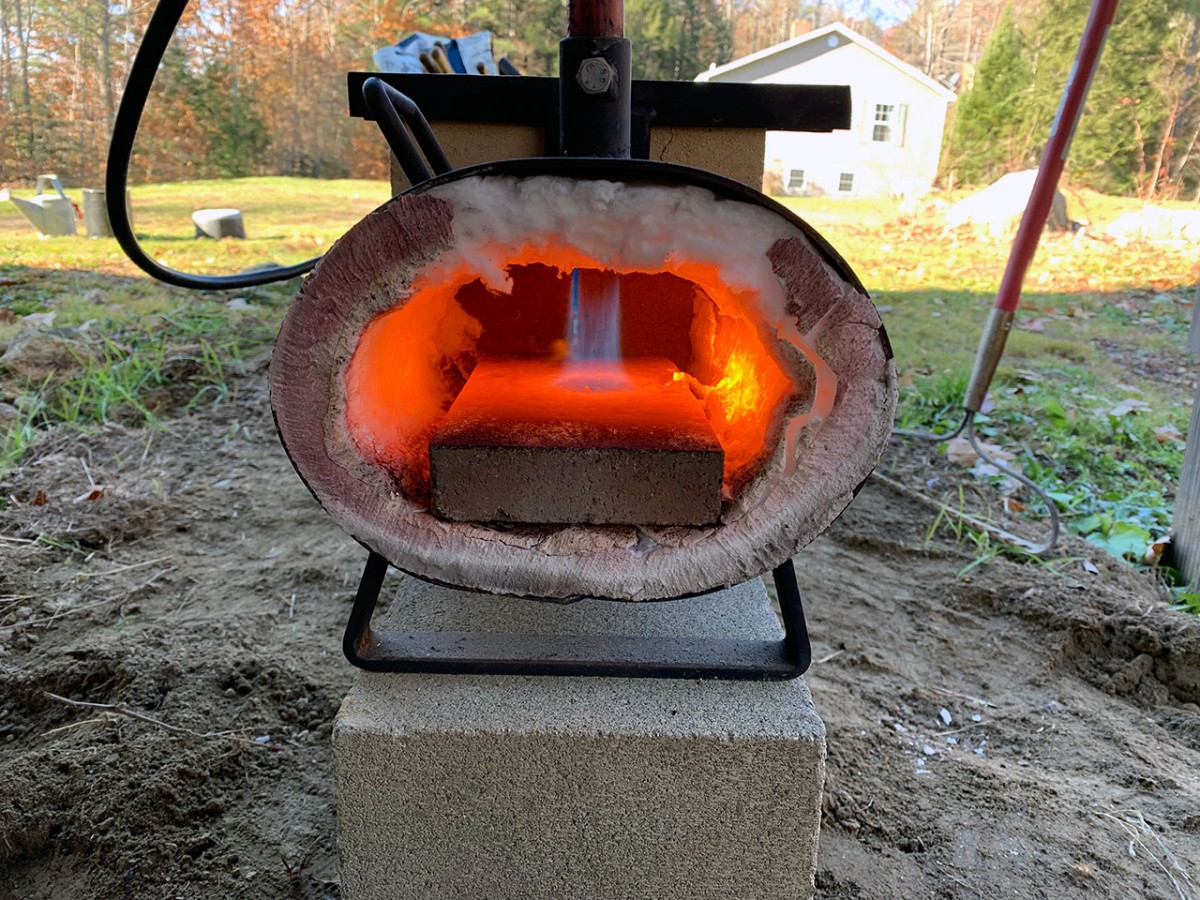
Forge
If you don’t yet have a forge, then my recommendation is the Vevor single burner forge. This thing is affordable and works amazingly well for the cost. As a beginner you shouldn’t need anything larger than a single burner. I have a double burner and 95% of the time I only use one of the burners.
The only downside with this forge is it does not come with a refractory mortar. You will want to cover the cotton liner with a refractory mortar to protect it, help retain heat and reach high temps, and also to keep that cotton from flying around and into your lungs (very dangerous).
The refractory I like to use is called satanite. Just mix it with water and brush it on. That link is to a 10lb box of it. I know 10lbs sounds like a lot, and it is, but you’ll constantly be repairing cracks and damage to your refractory so having plenty on hand is good.
Hammer
I cover hammers in more detail on my other article, such as styles of hammers and weights, but here’s my two suggestions.
The Picard hammer is a great Swedish style cross peen at a reasonable price. As a beginner I would get the 35oz version (just over 2lbs). This is the first hammer I bought and I used it for years. I still have it and it’s in perfect shape. I’ve just gone another route.
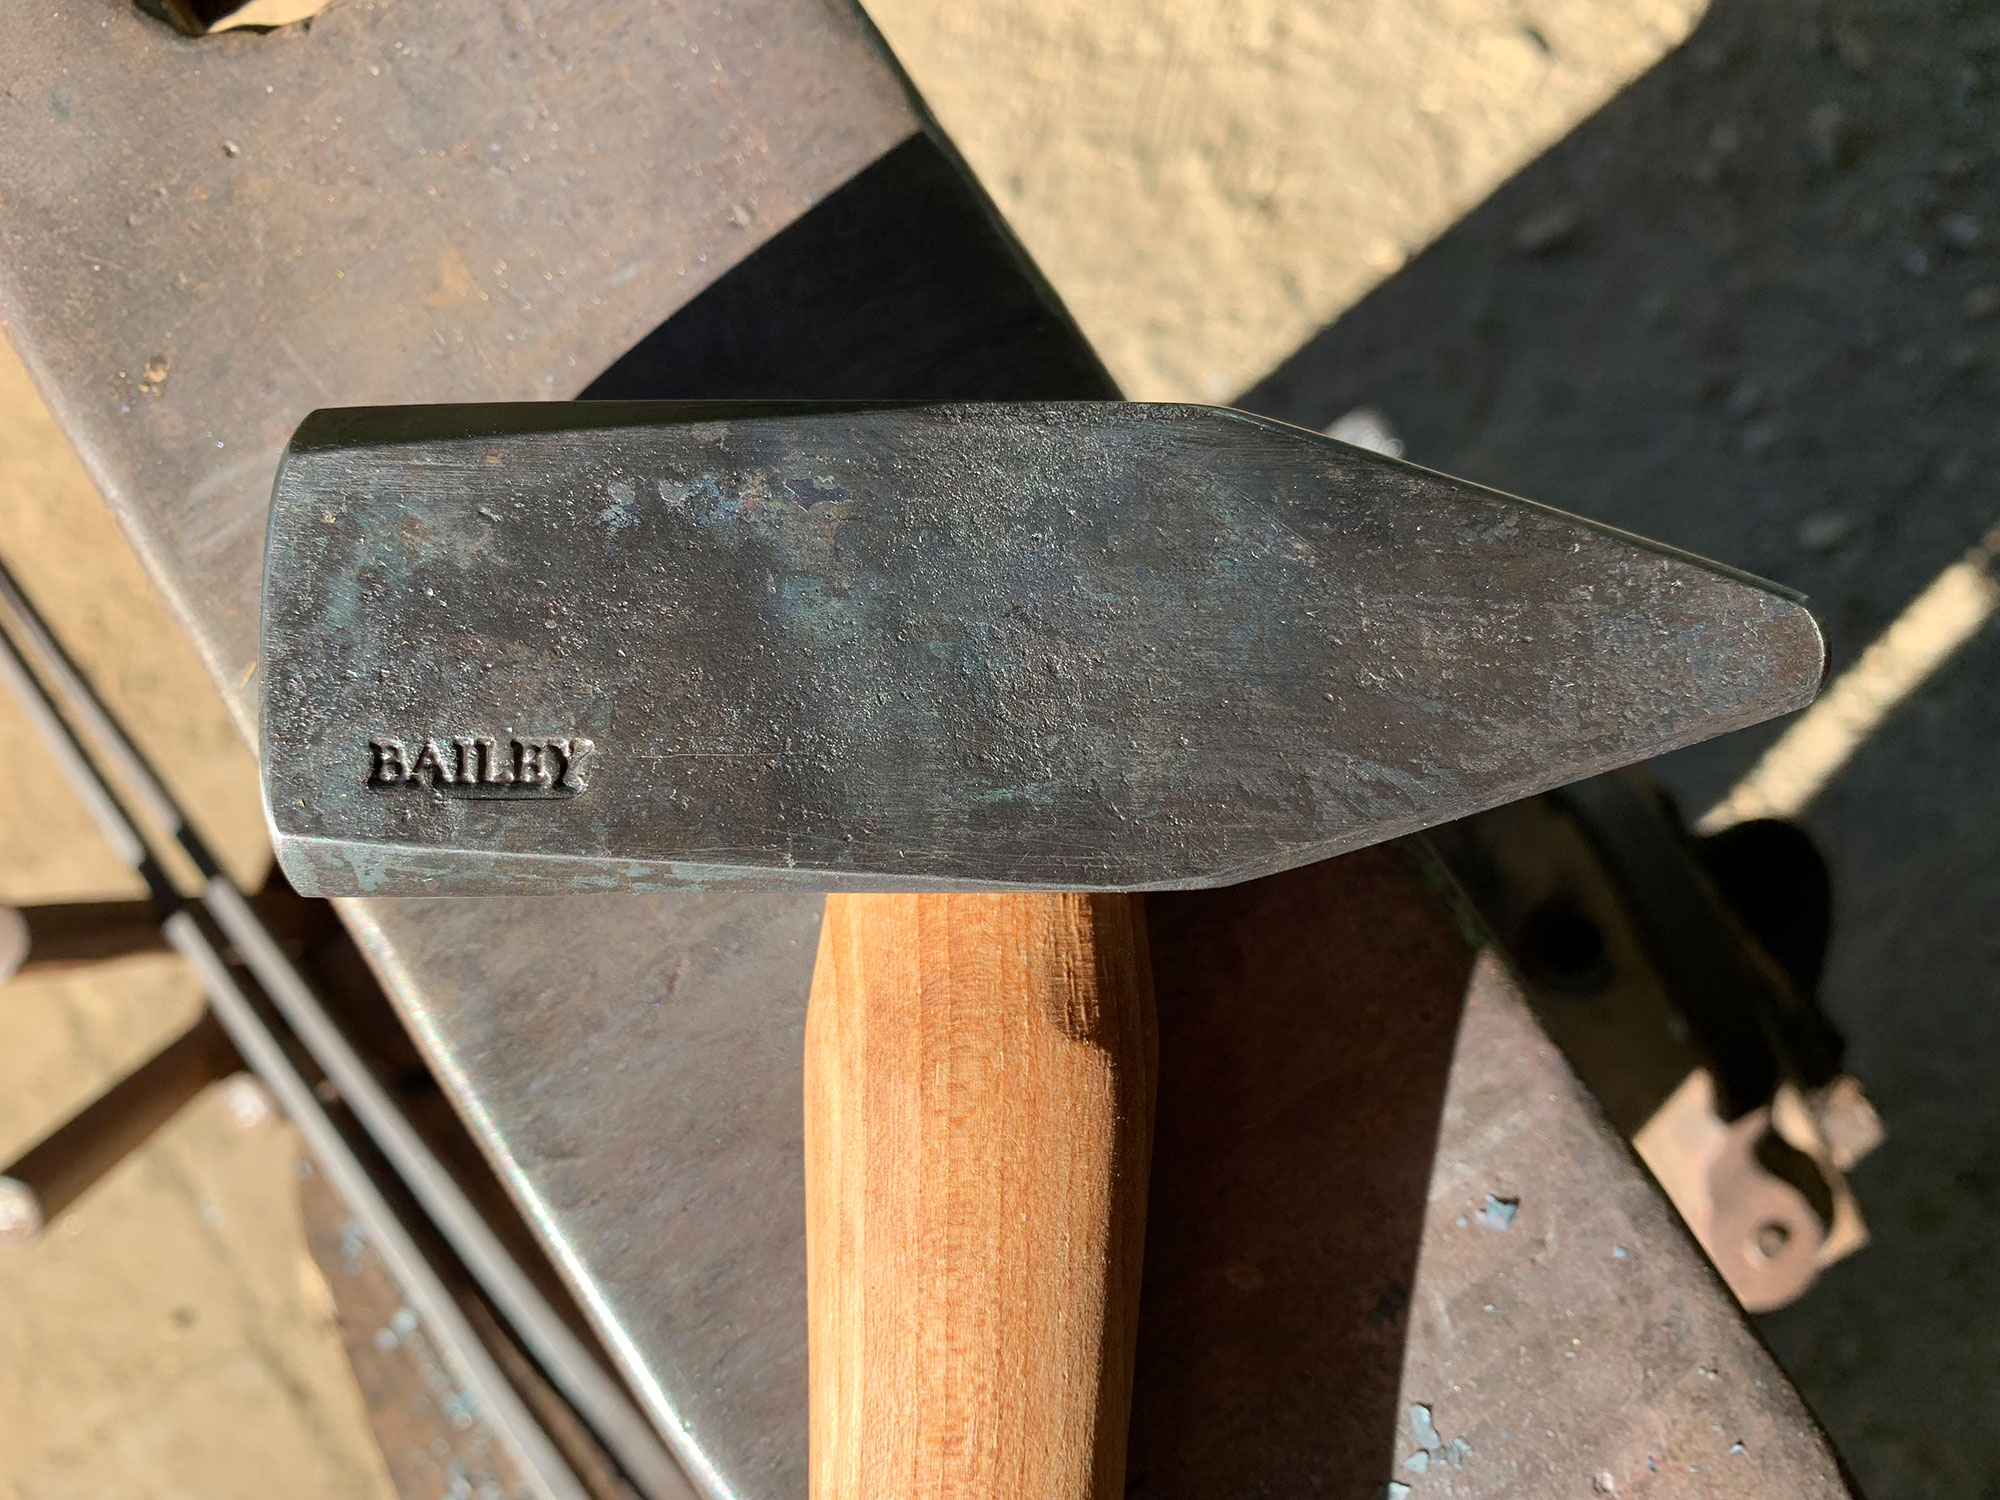
The pricier option, and also the best quality, is taking a look around Brent Bailey’s site. He’s a wonderful hammersmith. I own two of his hammers currently and I love them. They’re a bit more expensive than the Picard mentioned above but these are forged by a smith, not mass produced, and carry a quality you won’t otherwise get.
The last hammer I got from him was only $60. A smith forged hammer for $60? Yeah, I jumped on that.
Tongs
There’s two ways you can go as a beginner with tongs. You can buy tongs already made or you can buy blank kits that require a bit of forging and you to assemble them.
When I got started I bought blanks. They’re cheaper and it’s a good way to start learning how to make your own. I will always support another blacksmith when I can and so I suggest checking out Ken’s Custom Iron for tong blanks.
If you get the bundle set it will have a good variety of tongs that are great for starting out. Different tongs serve different jobs so you’ll want a handful even as a beginner.
Black Bear Forge did a good review of these on his channel.
If you want the ready to go variety, then you’ll find quite a few options on Amazon. None of those tongs are great quality though so be warned. They’re good to get you started but you’ll want to upgrade when you can.
Anvil
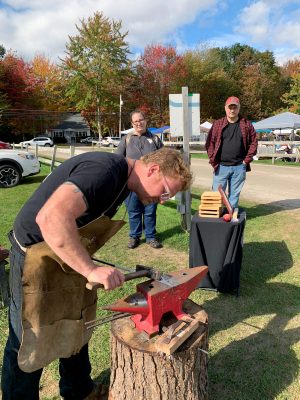
As a beginner I can’t recommend the Doyle anvil from Harbor Freight enough. It’s a smaller anvil (65lbs) but has a wide face (top). I use this thing for demos and it has held up great for years now. The picture you see is me doing a demo on that anvil.
I have used and abused my Doyle for years now and it has held up great. The only thing that bugs me about it is the red paint. Hot metal hitting red paint = smoke and fumes. I should take the time to wire wheel off the red paint but I just haven’t gotten to it yet.
If you don’t have access to Harbor Freight, then Vevor has a good anvil as well. Also a small anvil at 66lbs. I have not used this anvil but I’ve heard good things about it.
By in large the Vevor is pretty much identical to the Harbor Freight with one exception – it has a square tail instead of a triangular one. I honestly like the triangle tail on the Doyle and have found it useful for setting shoulders close together.
Vise
We all know what vises are used for and every blacksmith should own a few in different sizes for different tasks.
Post/Leg Vise
The ideal vise you can get is a post vise, also called a leg vise. This is your traditional blacksmithing vise made to be abused. These are intended to hold hot metal while you hit it – unlike the typical bench vise.
A bench vise is held on by bolts at the edge of a table. Hammering downwards on a vise like this will cause it to come loose and eventually come off your bench. A post vise has a leg that goes to the ground to transfer the force through the vise and into the ground.
Post vises are not cheap. I got lucky and found mine at an antique shop for $150. The vise is well over 100 years old and it’s in great shape. I still use it every day. You’re best bet in finding one that’s affordable is Facebook Marketplace, Craig’s List, or antique stores.

If you want to buy a new one, then the one I hear good things about is from Kanca. This is the 5″ leg vise from them. I have seen other smiths trying these out and liking them. It’s not a cheap option starting out though.
Here’s a video from Black Bear Forge on the Kanca leg vise.
Bench Vise
Now, you don’t need a post vise when you’re starting out. Great to have and get when you can, but you can get by with a bench vise. I just don’t recommend a lot of hammer work in them. They are great though for holding hot metal for twisting or for file work. I have a bench vise I use to hold metal when I’m cutting it to length.
I have a Harbor Freight 5″ swivel vise that I drag around when I do demos. It’s cheap, gets the job done, and I’ve had no issues with it.
If you can’t get a Harbor Freight one, then Vevor has a 6″ vise for around the same cost at the 5″ one from Harbor Freight.
Both of those choices are light on the wallet and ones I would consider as a new smith. You don’t need the best vise ever made to hold hot metal to twist it or cut it. Get something that you can afford and does what it needs to do.
Files
Files are invaluable in blacksmithing. Whether you need to file something down so it’s even, or use it to create decorative elements in your work, you’ll find you’ll always need files.
There are a lot of different files out there in different shapes, sizes, and coarseness. Eventually you’ll own all of them, but for starting out there’s a few I recommend.
First up, these files from Nicholson are great. I have a set of these and it gets you flat files, a half round file, and a triangle file. All shapes you’re going to routinely need. I would add a round file to the mix as well. Nicholson has one of those as well.
Notice I’m not linking to files with plastic handles? You’re dealing with hot metal so I prefer my files either have metal handles or wooden handles. If you need to aggressively file something, then you’re going to do it while the metal is at a forging heat. Hot metal files faster. I don’t want to worry about plastic handles on 2,000 degree metal.
On that note, another file to add to your arsenal is a farrier’s rasp. Using a farrier’s rasp on hot metal is the fastest way to remove metal by hand. The file is very aggressive and when combined with heat (the metal), you can make short work of monumental tasks.
Drill Press
This was the first investment (bigger tool) I made into my blacksmithing business and easily one of my most used tools. Rarely is there a day that I’m not using this.
I thought it was fine using a normal drill. It was. It did the work, but it’s night and day compared to a drill press. A drill press is faster and easier by a very large margin.
I love doing traditional blacksmithing as much as I can. I will use rivets and tenons for joinery over welding every single time that I can. Part of traditional blacksmithing is punching holes instead of drilling. While I will gladly punch a hole when it serves the project, I will also jump to my drill press if it better serves me. Let me explain.
If I’m making a simple J hook and the mounting area is very thin metal, then odds are I’m going to drill it. I find punching thin metal tricky. I could stand to get better at it no doubt, but there’s another reason I’ll drill too. It and may ruin what I have.
One of the cool things with hot punching holes is it will distort the metal around it as it spreads out. It creates this very identifiable look. This distortion adds to the aesthetic of something hand-forged if you ask me.
However, there are times I do not want the metal distorted. Take the J hooks I mentioned. Not only is the metal thin where I need to make a hole but distortion would ruin the look I’ve established. So if I want to maintain the design immediately around where the hole will go I will drill it.
There’s also the practical reason of using a drill press and that’s speed and efficiency. If I’m prepping for a show where I need to make 20 J hooks, then I find it’s faster and more efficient to use the drill press once everything is forged out.
Also, if I’m working a bigger piece and I need a hole in it and the metal is thick and wide, then I won’t get that distorted look. There’s too much mass around it. In cases like this where I won’t gain anything by punching I will drill it.
While I go as traditional as I can with blacksmithing, I’m also not married to it. Some smiths shun the idea of using a drill press, usually the full traditional smiths, but I look at it this way. If a blacksmith from 1740 had access to a drill press, then you damn well can be sure that smith would have used it for all the same reasons.
Buying a Drill Press
I got lucky and I bought my drill press off Facebook Marketplace for $75. It’s a roughly 1990’ish Craftsman variable speed drill press. It was in excellent condition and I’m still using it.

If I were to buy a new one today, then these are the ones I would consider. Each of these is a variable speed drill press, tabletop style, 10″ size, and 6.2 amp motors. The tabletop ones are more affordable than the full sized versions and I have yet to encounter any reason I’d need anything bigger than what I have. If I were doing architectural work, then maybe I’d need a larger drill press but I’m not working that large.
The variable speed is important in metalwork. Generally you want to drill at very low speeds (low RPM) to avoid overheating the drill bit and to ensure the drill bit stays sharp. Also, I highly recommend getting some Tap Magic. This is cutting fluid that’s great for drilling and also for tapping. I use this every time I drill and my bits have held up way longer than normal because of it.
Vevor
First up is the Vevor. In recent years Vevor has jumped into the tool making industry with affordably priced tools. They aren’t going to be the best tools you’ll own but they hold up well for the cost. I actually own the Vevor single burner forge that I use for demos and it’s been great.
The nice thing with this Vevor drill press is it has a built in work light and also a tilting worktable. Having the light is invaluable and there are times I wish I had a tiling worktable.
Ryobi
The next one is the Ryobi. The big feature on this is the laser alignment system. I don’t think it’s necessary since you should be center punching your holes prior to drilling them, however, it’s a nice add-on that could be useful. Regardless, Ryobi is a brand name and this is price well considering that.
Skil
Lastly is the Skil drill press. Another name brand and also the priciest in the list. This one also has a laser alignment feature and has a work light. The work light I’m more excited about than the laser alignment but I’m sure that laser alignment has its uses.
Work Light
Going back to my drill press. Being an older model it doesn’t have a work light on it. A light I highly recommend is this one. The light has a flexible neck and a very strong magnet for a base.
I own two of these. One is mounted on my drill press (seen in the image above) and the other on my bandsaw. Where those tools are has poor lighting and this fixes that issue. Plus, even with good lighting you’re often casting a shadow on your work so I can’t recommend this light enough.
Angle Grinder
Angle grinders are not only great at cutting metal but also for sanding metal and cleaning metal. Every blacksmith should own one or more of these.
My first suggestion is this one from DeWalt. I own this one and use it every single day. I love the 11 amp motor and the 11,000 rpm speed. I cut small stuff, pipe, and 1″ bars with this. It’s a great value and well worth picking up.
The other angle grinder I own is this cordless one from Ryobi. This one lacks the power of the DeWalt but I wanted a cordless one for the odd times I need to do something where I can’t get power. It’s still a good grinder but it wouldn’t be my #1 pick if you were buying just one grinder.
If you want something more budget friendly, then Skil has a good 6 amp grinder. I haven’t used this one but I did own a 6 amp grinder before getting the DeWalt and it got the job done. Thicker metal is a bit of a chore but if you’re working with 1/2″ and smaller metal then you’ll do just fine with this.
Welder
Welding is not my forte so I’m not going to recommend any specific welders to you. Instead I’ll tell you why you should own one.
As a blacksmith, especially if you’re doing it for a business, you’re going to want to make jigs to use. Jigs are forms you create to help you bend and/or shape metal consistently and quickly.
For example, I have some jigs I use for bending hooks, bending handles, creating 90 degree bends, etc. Basically, anything you need to do often you should consider making a jig for it.
Here’s a quick reel of a jig I use for making garden hose guides.
To make those jigs you’re going to need to weld them together. You don’t even need to be a good welder. I have jigs I still use today that I welded together when I got started. The welding looks awful and I can’t believe they’ve held up but they have. You’re bending hot metal so you don’t need structural strength welds on the jigs.
There are also times in smithing when traditional joinery either isn’t going to work or it’s not worth the time and effort. In that case just bust out the welder and get it done.
I will tell you what I own for a welder though. I have a SMAW (shielded metal arc welding) or better known as stick welder. The only reason I own a stick welder instead of anything else is the cost. I got a used one from someone for $50. Also, I did some stick welding in high school, though I quickly learned I had forgotten everything.
Definitely do some research on welders and figure out what’s right for you.
Bench Grinder
These come in a few different forms. You have your old-school bench grinders that use the wheels and also the modern ones that use sanding belts. Both have their uses.
Wheel Grinders
I don’t often use my wheel grinders for grinding, though I do on occasion. If I need to do some very aggressive grinding, then I’ll use it. What I mostly use this for is cleanup. I put wire wheels on one of my grinders to clean up scale from metal. They work great for this.
I inherited the wheel grinders I have. However, if I were in the market for a new one these are the ones I’d look at.
This 6″ Ryobi bench grinder has a lot going on for the price. It has a 1.61 hp motor that does 11,000 rpms. For the price that’s impressive and probably my go-to choice for cost alone.
Another budget option is the Vevor 6″ grinder. This one has a 3.8 amp/5 hp motor. As I’ve noted throughout, Vevor isn’t a top brand but low-cost products that get the job done and hold up.
Belt Grinders/Sanders

The belt grinders are your bread and butter grinders. You’ll do most of your grinding work on these. While the wheel grinders have a use, you can get away without having one as you start blacksmithing. If you’re pondering between the two styles, then get the belt grinder.
Much like when I got my drill press, getting a belt grinder was ground breaking for me. Prior I was using the wheel grinder which was not ideal for small work. Having the belt grinder opened up a lot of options for me and just made life easier for countless reasons. Having a grinder you can jump to for quick cleanup, reshaping/grinding, creating bevels or chamfers, is awesome
The first grinder I bought was this 1″ one from Grizzly. Is it the best bench grinder you’ll own? No. Yet I used mine daily for 2 years and it held up like a champ. In fact it’s still working but I replaced it with the 2″ x 42″ version they make. The 2″ version is pricier and not something you need when you’re starting out though.
Another affordable choice is the 1″ one from Harbor Freight. I haven’t used this particular belt sander but I know smiths who started with this one and got by just fine.
Essential Tools for Blacksmith Conclusion
There are a lot of tools that are useful for a beginner blacksmith but these are the ones you should invest in first. These tools will help you out tremendously and have more value than you might think.
Like anything, you get what you pay for. That being said, there’s no shame in buying budget tools to get a job done. I have and will continue to do so when my budget doesn’t permit me to get a high-end version. Even if I only get a few years out of a tool I figure if I made money while using that tool then it paid for itself and was worth the cost.
If you think I missed something, then please let me know in the comments.